Nov 13, 2026
The solar roof mount bracket is the smallest structural part of a rooftop PV system and the one that decides whether the array survives its first storm. It is the point where rail meets roof, where dead load, wind uplift and snow load enter the building, and where a careless fixing turns into a leak. This guide explains the main bracket families, what each one is designed to do, and how to match a bracket to the roof you actually have.
Unlike a general installation manual, this article focuses on the bracket itself: its geometry, its load path and the selection checks that keep a rooftop array stable for 25 years. If you are comparing solar panel roof mounting bracket options for a project, start here and then confirm the numbers with your structural engineer.
What Does a Solar Roof Mount Bracket Do?
A roof mount bracket performs four jobs at once. It lifts the rail clear of the roof surface so water can drain and air can move. It spreads the concentrated load of the array over a base plate or fixing foot. It creates a corrosion-resistant connection between aluminium rail and the roof structure. And it provides a repeatable datum, so every rail in the array ends up at the same height and angle.
The bracket is only half of the load path. The other half is the rafter, purlin or deck it is fixed into. A bracket rated for high tension is useless screwed into 12 mm of roof sheathing, and the strongest rafter in the building cannot compensate for a bracket that crushes the tile above it. Always evaluate the two together.
Six Types of Solar Roof Mount Bracket
Roof coverings behave differently under a fixing, so bracket design follows the covering. These are the six families used on almost every residential and commercial rooftop project.
1. Roof hooks for curved and flat clay tiles
A roof hook reaches over the tile and fixes into the rafter below, so the tile itself carries no load. The tile is lifted or cut just enough to let the hook pass, then flashed or reseated. Stainless steel hooks are preferred in coastal areas, and adjustable-height hooks solve the problem of an uneven tile plane. A well-made solar tile roof bracket should let you set the rail height after the hook is fixed, which saves a second visit to the roof.
2. L-feet for trapezoidal metal roofs
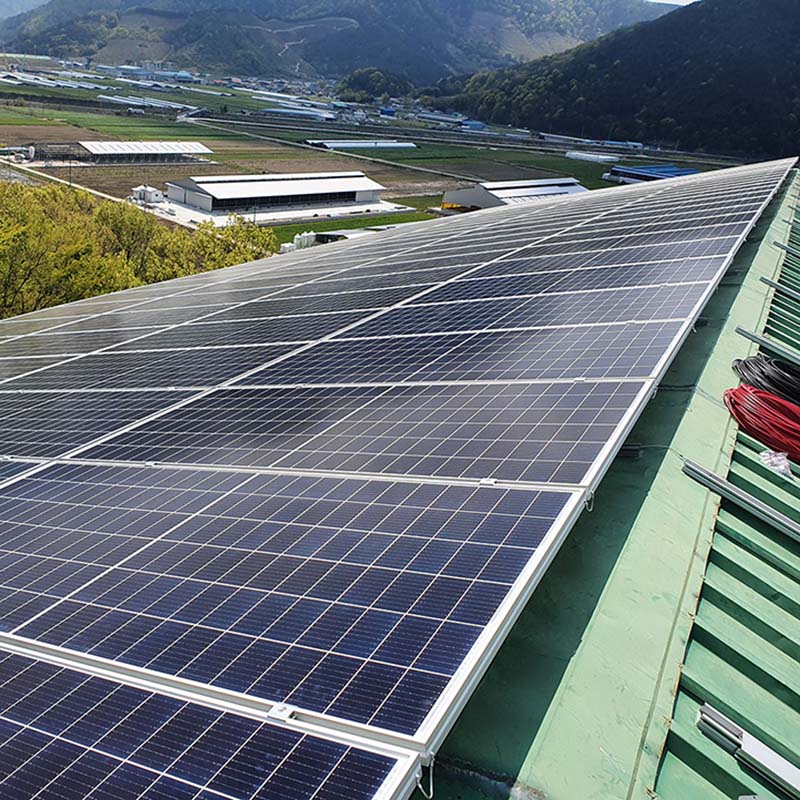
On a trapezoidal steel sheet, the bracket is screwed through the high rib into the purlin, with a sealing washer under the head. The L shape keeps the rail above the profile and allows lateral adjustment. Correct solar Racking L Feet For Metal Roof have slotted holes, so the installer can align the rail without elongating the sheet. Fixing into the low pan rather than the rib is the most common cause of leaks on this roof type.
3. Hanger bolts for shingle and slate roofs
A hanger bolt is a wood-thread stud with a machine thread on top: one end goes into the rafter, the other takes a nut and bracket. It is the standard choice for asphalt shingle roofs because it creates a small, easily flashed penetration. The shingle above the fixing must be lifted, not cut, and the flashing slid under the course above so water still runs over the top.
4. Standing seam clamps
Standing seam metal roofs can be mounted without a single penetration by clamping onto the seam. The clamp must match the seam profile and be tightened to the manufacturer's torque, with a set screw that does not dent the panel. This is the fastest and most reversible bracket on the list, which is why it is popular on commercial buildings and on roofs where the owner refuses to accept holes.
5. Mini rails for corrugated sheets
A mini rail is a short aluminium section fixed directly to the sheet or purlin, used where a full rail would sit too high or where the array follows a short run. It reduces part count and cost on simple sheds and carports, but it offers less adjustment than a full rail system, so layout accuracy matters more during installation.
6. Tilt brackets for flat roofs
On a flat or low-slope roof the bracket has to do more than connect: it has to create the tilt. Front and rear legs form a triangle that sets the array angle, and the assembly is either ballasted or anchored to the deck. An Adjustable Tilt Solar Mounting Bracket lets the installer set the design angle on site, which is useful when the roof is not perfectly level or when the pitch must be tuned for winter yield.
Advantages of a Roof-Specific Mount Bracket
Brackets look similar in a catalogue, but the differences show up on the roof. These are the advantages that matter to installers and building owners.
1. It protects the roof covering and its warranty
A bracket designed for the covering creates the smallest possible opening and gives the flashing somewhere to sit. That keeps the waterproofing layer intact and avoids the argument with the roofing manufacturer about whether the PV installer voided the membrane warranty. On a new building, this protection can be worth more than the entire bracket budget.
2. It transfers load into structure, not into the finish
The right bracket reaches the rafter or purlin with a known fixing length, so the allowable pull-out value in the test report actually applies. Load is spread across a base plate instead of a single screw head, which reduces the risk of crushing timber or cracking tile. That predictable path is what lets an engineer sign off the array without over-designing the whole roof.
3. It delivers a 25-year corrosion life
Anodized 6005-T5 aluminium and A2 or A3 stainless steel fasteners resist rain, salt and industrial pollution without maintenance. The bracket is often the first component to fail on a cheap system, because a zinc coating is scratched during installation and starts rusting in the same season. Specifying the material correctly the first time avoids a rooftop replacement that costs far more than the parts.
4. It makes installation faster and more repeatable
Slotted holes, a captive nut and a defined standoff height remove guesswork. Two installers can set a row of brackets without measuring each one from scratch, and the rails drop into place with consistent gaps. On a large commercial roof, the labour saved on bracket setting is usually the biggest single reduction in installation cost.
5. It absorbs roof irregularities
Older roofs are never perfectly flat. Adjustable hooks and height-setting brackets let the installer level the rail plane above a wavy tile field or a sagging purlin, instead of packing the difference with washers. The result is a straight array, even clamp pressure and glass that is not stressed by a twisted frame.
6. It lowers the total cost of ownership
A bracket that fits properly needs no extra flashing kit, no site modification and no return visit to fix a leak. Fewer parts and standard tools shorten the installation, and a corrosion-resistant system needs no repainting or replacement during the module warranty period. The cheapest bracket per piece is rarely the cheapest bracket per installed kilowatt.
How to Specify a Solar Roof Mount Bracket
Work through these checks in order. Each one can eliminate a bracket family before price is even discussed.
Roof covering and profile: tile, shingle, standing seam, trapezoidal sheet, corrugated sheet or membrane. The covering decides the bracket family, not the other way round.
Structural member and spacing: rafter or purlin size, species or steel gauge, and centre spacing. Bracket spacing cannot exceed what the member can carry.
Design loads: dead load, snow load and wind uplift for the building height, terrain and edge zones. Uplift usually governs on exposed roofs.
Standoff height: enough clearance for water, debris and module ventilation, while keeping the lever arm on the fixing as short as possible.
Material and finish: 6005-T5 aluminium, anodized where the atmosphere is aggressive, and stainless steel fasteners with isolation washers between dissimilar metals.
Certification and test data: a load report that states the test method, the allowable values and the safety factor, not just a panel count on a datasheet.
Bracket Spacing and Load Checks
Bracket spacing is set by the rail span, not by a fixed rule of thumb. The rail manufacturer publishes a maximum span for a given snow and wind load; the bracket spacing must then be equal to or less than that span, and each bracket must be able to carry its share of the load with the safety factor required by the local code.
Pay particular attention to the corners and edges of the array. Wind speeds up locally at roof edges, so the corner brackets often need to be closer together or rated higher than the field brackets. On a large flat roof, ballast weight and wind uplift have to be balanced; on a pitched roof, the weak point is usually the pull-out capacity of the fixing in the rafter, not the bracket itself.
Installing a Solar Roof Mount Bracket
Set out the array from the module layout. Mark rail lines and bracket centres on the roof, keeping the array square and clear of hips and valleys.
Locate the structure. Find rafters or purlins with a stud finder or by lifting the covering, and confirm the fixing will land in the centre of the member.
Fix the bracket. Drill to the specified depth, seal the penetration, and tighten to the published torque without compressing the roof sheet or cracking the tile.
Flash and reseat the covering. Slide the flashing under the course above, reseat the tile or shingle, and check that water still flows over the joint rather than into it.
Mount and align the rail. Attach the rail, check height and diagonal dimensions, and tighten the rail-to-bracket connection last.
Bond and inspect. Confirm electrical bonding, re-check every fixing torque, and photograph the completed bracket row before the modules go on.
Common Bracket Mistakes
Fixing into roof sheathing or battens instead of rafters and purlins, which leaves the bracket with almost no pull-out capacity.
Using the same bracket on every roof type, then cutting tiles or elongating metal sheets to make it fit.
Skipping the flashing or relying on sealant alone, which fails within a few seasons of thermal cycling.
Mixing stainless fasteners with galvanized or aluminium components without isolation, causing galvanic corrosion.
Ignoring edge and corner uplift zones, where brackets need closer spacing or a higher rating.
FAQ: Solar Roof Mount Bracket Questions
Which bracket is best for a tile roof?
A roof hook fixed into the rafter is the standard solution for clay and concrete tile. Choose a hook with adjustable height so the rail plane can be levelled above uneven tiles, and make sure the hook is stainless steel if the building is near the coast. Never load the tile itself; it is a weather covering, not a structural member.
Can a roof mount bracket be installed without removing the covering?
Usually yes. Tile hooks lift or notch a single tile, hanger bolts lift the shingle course above the fixing, and standing seam clamps require no penetration at all. On some brittle or historic coverings the only safe route is to remove and reinstate a small section, so assess the covering before promising a no-removal installation.
How far apart should roof brackets be spaced?
Close enough that the rail never exceeds its published span for the design snow and wind load, and no wider than the rafter or purlin spacing allows. Edge and corner zones often need closer spacing than the middle of the array. The final figure should come from the rail span table plus the bracket load rating, not from a fixed distance copied between projects.
What drives the cost of a solar roof mount bracket?
Material grade, finish, adjustment range, base plate size and the test data behind the rating. Stainless hooks cost more than galvanized ones, and an adjustable bracket costs more than a fixed one, but both can reduce labour and call-backs. Compare the installed cost per kilowatt, including flashing and fixings, rather than the unit price of the bracket alone.
Specify the Right Solar Roof Mount Bracket
A solar roof mount bracket carries the entire array through a handful of small fixings, so it deserves more attention than its price suggests. Match the bracket to the covering, confirm the structural member and the design loads, insist on corrosion-resistant materials, and keep the flashing detail simple enough to repeat on every fixing. Do that, and the roof stays watertight while the array stays put.
Tell us your roof type, rafter or purlin spacing, module dimensions and local wind and snow loads, and our team will put together a bracket, rail and clamp schedule for your project, with the matching test data and a complete bill of materials.
Read More



 IPv6 network supported